


Add New Project Team Members
Perform the following steps to add a team member to a project in Info Exchange.
Only Project Center users can add new team members from the Project Team log.
To add team members
1 If you are not already there, go to the Project Team log and select Add Team Members to open the Add Team Members dialog box, shown here:
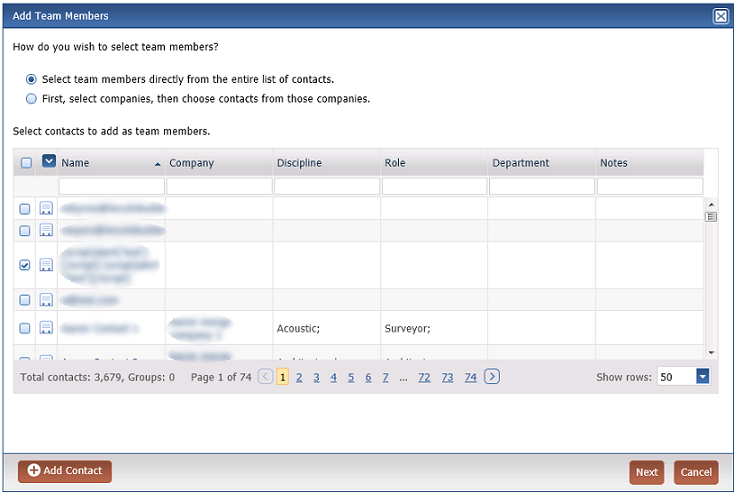
2 Select the method you want to use to locate and select new team members:
● Select Team Members Directly from the Entire List of Contacts. Use this option to locate an existing contact by using the name of the contact in the filter.
● First, Select Companies, then Choose Contacts from Those Companies. Use this option to locate an existing contact by using the company name in the filter.
● Add Contact - Click to open the Add Contact dialog box to create a new contact.
3 Mark the checkbox for the desired contacts and select OK to assign more options in the Add Team Members dialog box, shown here:
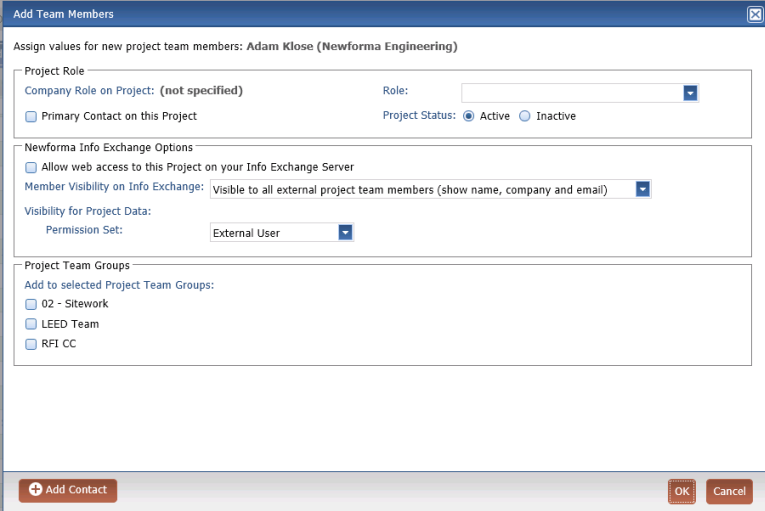
4 Select the contact's role on the project:
● Role - Select the project role for the contact from the drop-down list.
● Primary Contact on This Project - Mark this checkbox to set the contact as the primary contact for the project.
Each project can have multiple primary contacts.
● Project Status - Select whether the team member is Active or Inactive in the current project.
5 Select the Newforma Info Exchange options:
● Allow Web Access to this Project on Your Info Exchange Server - Mark this checkbox to grant the contact access to the project on Info Exchange. When marked, the contact can see this project in the list of projects on Info Exchange.
● Member Visibility on Info Exchange - Set the level of access to determine how external users can see this contact when they create new project items.
6 Select the permission set for the contact.
7 Mark the checkbox for any project team group (if they exist) to which the contact should belong.
8 Enter relevant data in the Project-Specific Custom Fields section as needed.
This section only appears when the project includes custom fields.
9 Select OK to add the contact.
Table of Contents
Index
Search (English only)
Back