Project Timeline Quick Reference Guide
This topic provides a reference for the Project Center Project Timeline activity center. In Info Exchange, the information is displayed on the Project Calendar page.
Click here to download a PDF of the reference guide.
Purpose
The Project Timeline activity center enables the team to track and manage important project-specific events. You can associate events with supporting documents and related items like action items. In this way, you can use it to effectively log and track meeting minutes and action items associated with meetings or phone calls. Events can be displayed in an event log, calendar, or journal view.
Audience
Internal and external project team members.
Tasks Covered
Click a link to jump to the task:
● Change the project timeline views
● Create an event on the project timeline
To change the Project Timeline Views
1 In the Project Timeline activity center, you can view the items in three views: Calendar, Journal or Log. Select the desired view from the activity center drop-down list.
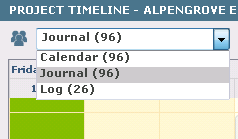
Info Exchange users can only view the calendar format from the Project Calendar page.
2 Change the scale of the Calendar or Journal view by selecting the Scale icon in the upper-right corner of the activity center and selecting your desired scale.
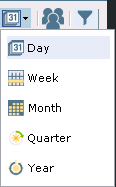
In Info Exchange, set the desired scale by selecting one of the buttons in the upper-right corner of the Project Calendar page.

3 Filter the project timeline view by selecting the Filter icon in the upper right corner of the activity center to launch the Select Items to Display in Project Timeline dialog box. Select which items to turn on or off in the timeline.
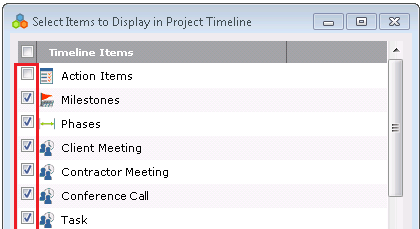
To create an event on the Project Timeline
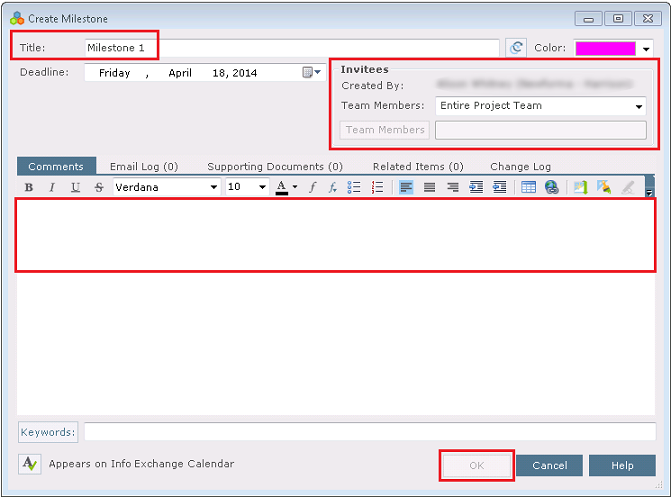
1 Select Add in the Tasks panel and select an event type such as Milestone, Client Meeting, Task or Phase.
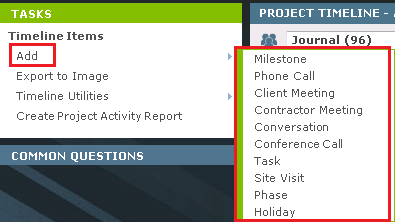
2 Fill in the appropriate information in the form for the event selected and select OK.
See the Newforma Meeting Minutes Quick Reference Guide for details on how to record meeting minutes.
To share the project timeline
You can add the project timeline to your Outlook calendar and receive automatic updates or send a static copy of the project timeline via email. The project timeline can also be shared on Info Exchange.
1 To add the project timeline to your Outlook calendar, select Timeline Utilities in the Tasks panel and select Add to Microsoft Outlook and Subscribe to Updates.

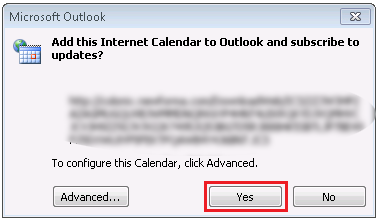
2 In Outlook select Yes in the Add this Internet Calendar to Outlook and Subscribe to Updates? dialog box.
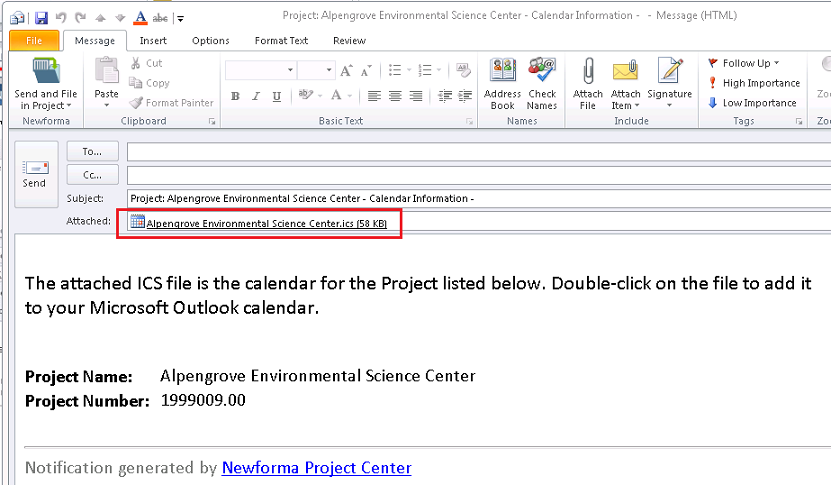
3 To send a static view of the project timeline, select Timeline Utilities and select Send Calendar via Email.

4 A new email is created with an .ics file attached that contains a static copy of the current project timeline.
Key Features
● View project-related events in a traditional calendar view, in a linear journal view, or a list log view.
● Add project-related items to any of the three views.
● Create and print calendars, activity reports and log reports.
● Subscribe to the Project Timeline and receive updates in Outlook.
Table of Contents
Index
Search (English only)
Back


