Assign Action Items
Perform the steps in either of the following two procedures below to assign an existing action item to a contact. You can assign action items from either Project Center or an Outlook item in the Project Center Add-in for Microsoft Outlook.
To assign action items from Project Center
|
1. |
If you are not already there, open the Action Items activity center (shown below) by clicking Action items from the Activities list or the Project Home activity center. |
|
2. |
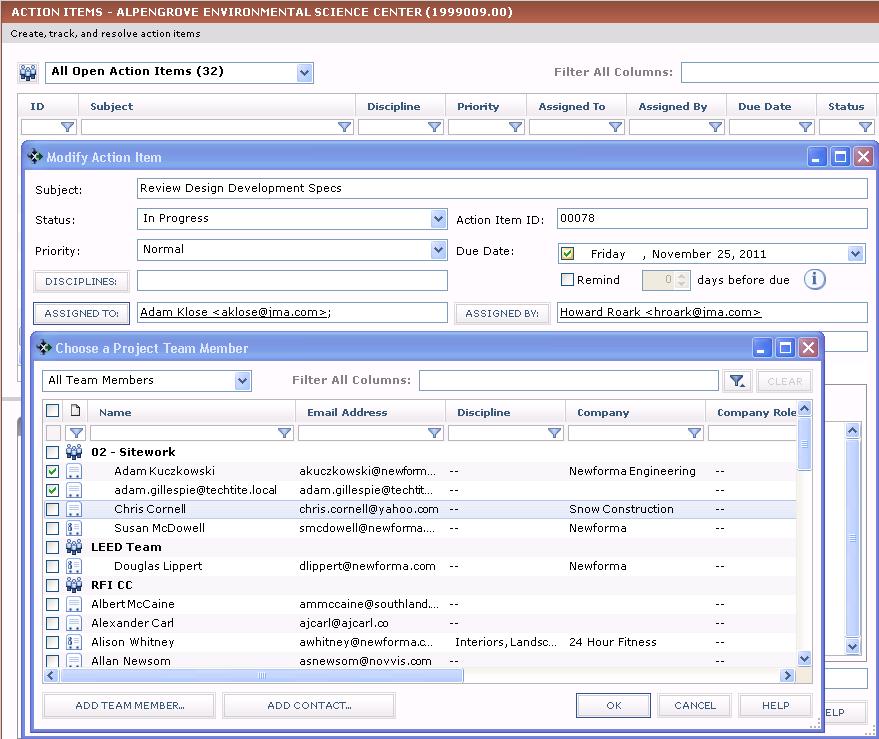
Open the action item you want to assign by double clicking it. The Modify Action Item dialog box opens. |
|
3. |
Click Assigned To to open the Choose a Project Team Member dialog box, as shown below, to select the project team members to assign the action item to. Select the team members, then click OK (you can also type any contact's email address directly in the Assigned To field).
|
|
4. |
Click OK when finished to assign the action item. 1 If the Send Change Notification Email checkbox is marked, an email message opens in Microsoft Outlook. Edit the message as necessary, then click Send and File in Action Item. The message is sent to the contacts in the Assigned To, Assigned By, and CC fields, and the email message is filed in the action item's Email Log. |
To assign action items from an Outlook item using the Project Center Add-in for Microsoft Outlook
|
1. |
From Microsoft Outlook, do one of the following:
|
|
2. |
Click Assigned To to open the Choose Project Team Members dialog box to select the project team members to assign the action item to. Select the team members, then click OK (you can also type any contact's email address directly in the Assigned To field). 1 As the assigner, you automatically become the Assigned By contact. |
|
3. |
Click Create or OK (depending on which dialog box you are using) when finished to assign the action item. If the Send Change Notification Email checkbox was marked, an email message opens in Outlook with the Assigned To, Assigned By, and CC contacts in the To field. Edit the message as necessary, then click Send and File in Action Item to send the email notification message and file the message in the action item's Email Log. |


