Configure Cloud Delivery on Info Exchange
Follow this procedure to enable project team members to share data with a cloud storage provider via Info Exchange.
You must be a Project Center administrator to perform these procedures.
This procedure is not related to the Newforma web app, Newforma mobile app or Newforma Contract Administration.
Project Center configuration tasks
The following tasks must be completed in Project Center before users can configure cloud delivery for their profiles on Info Exchange:
● Allow cloud delivery for the Info Exchange server
● Make the project available on Info Exchange
● Allow cloud delivery for the project
● Modify the permission set to allow cloud delivery
● Grant external users access to the project on Info Exchange
● Assign external users to a permission set that allows cloud delivery
Once these tasks are completed, Info Exchange users can add cloud delivery to their profiles. For information on configuring Info Exchange profiles for cloud delivery, please refer to Configure Cloud Delivery for Your Profile.
To allow cloud delivery for the Info Exchange server
1. If you are not already there, open the Project Center Administration activity center and click the Servers tab.
2. From the Servers drop-down list, select Project Center/Info Exchange.
3. Select the Info Exchange Server for which you are configuring the cloud delivery options.
The Type column indicates the server type.
4. In the
General tab, mark the Allow
Cloud Delivery On All Projects checkbox, as shown here, then click
Save Changes.
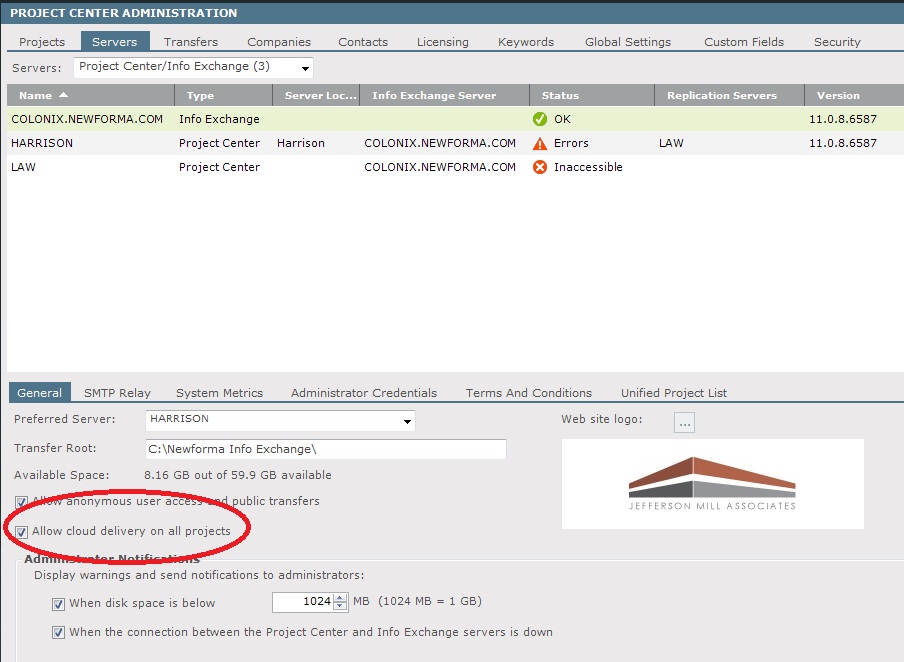
Once Info Exchange is configured to allow cloud delivery for all projects, make the projects that you wish to share information on the cloud delivery services available on Info Exchange, as explained in the next section.
To make the project available on Info Exchange
1. If you are not already there, open the Project Center Administration activity center and click the Projects tab.
2. Select
the project that you wish to make available on Info Exchange and click
Edit Settings in the Tasks
panel to open the Edit
Project Settings dialog box, shown here.
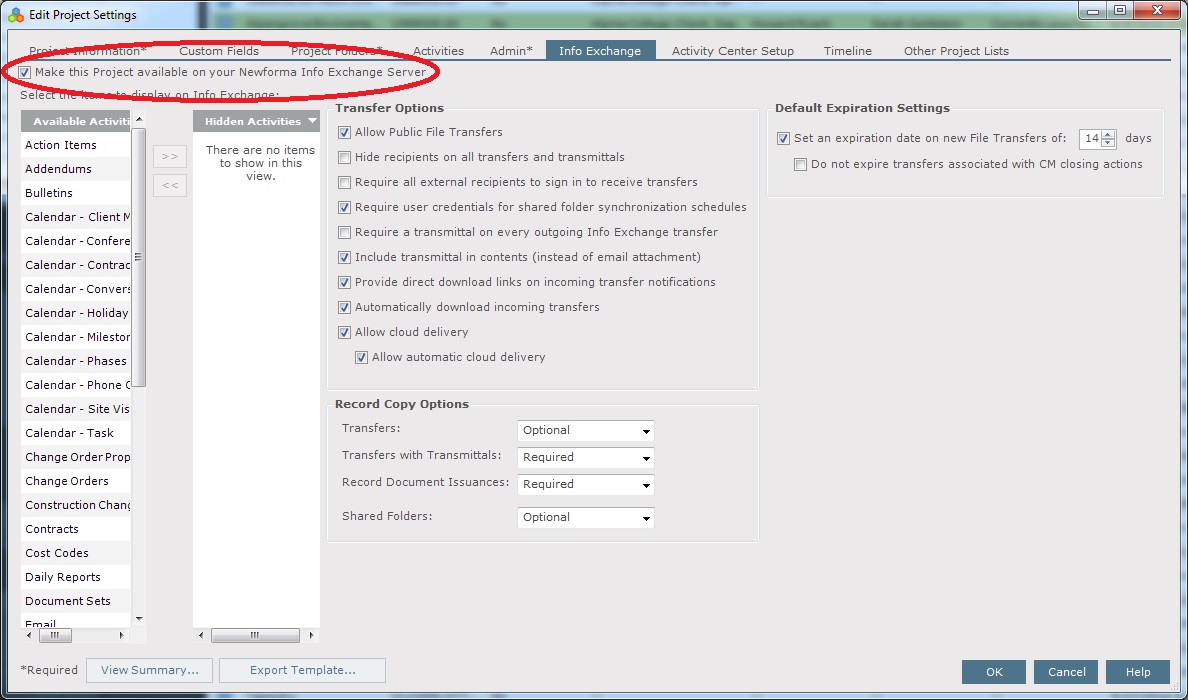
3. Click the Info Exchange tab and mark the Make This Project Available on Your Newforma Info Exchange Server checkbox, as shown above.
4. Click OK. It may take a few minutes for the project to appear on Info Exchange.
To allow cloud delivery for the project
1. If you are not already there, open the Project Center Administration activity center and click the Projects tab.
2. Select the project that you wish to make available on Info Exchange and click Edit Settings in the Tasks panel to open the Edit Project Settings dialog box.
3. Click
the Info Exchange tab and mark
the Allow Cloud Delivery and Allow Automatic Cloud Delivery checkboxes
in the Transfer Options section
of the tab, shown here:
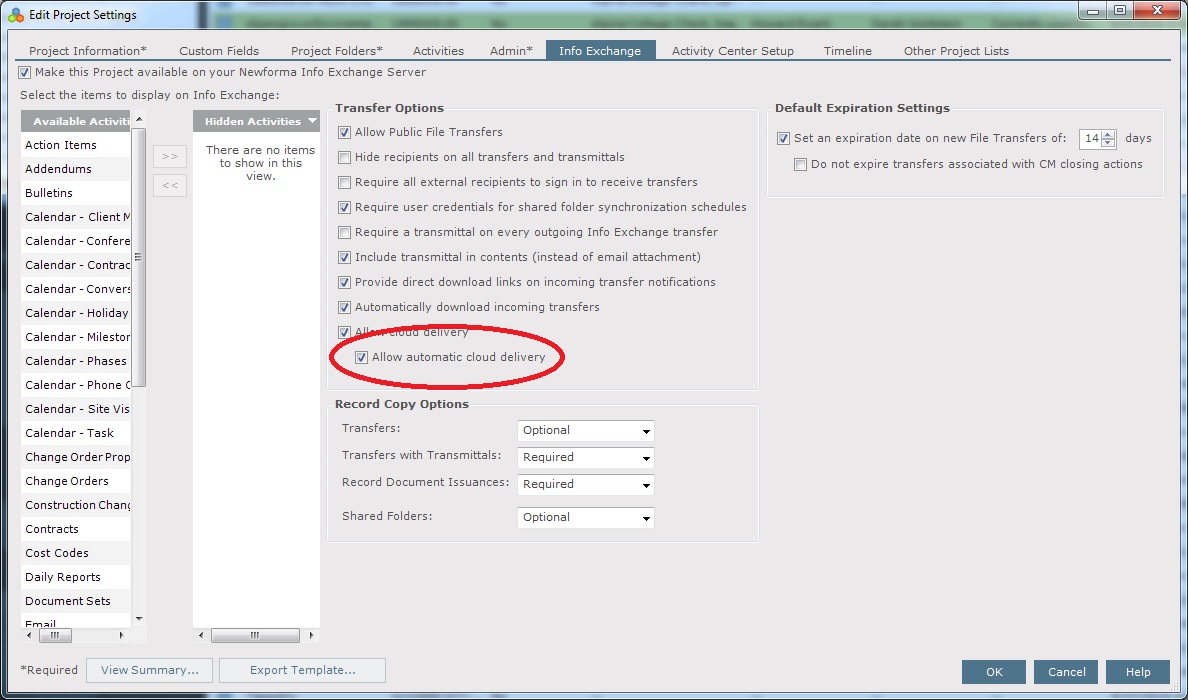
Use Allow Automatic Cloud Delivery to have file transfers sent directly to your account with your cloud service provider.
4. Click OK.
To modify the permission set to allow cloud delivery
1. If you are not already there, open the Project Center Administration activity center and click the Security tab.
2. Select the permission set that you wish to enable to access cloud delivery.
3. Click
Modify to open the Modify
Permission Definitions for Set dialog box, shown here.
4. Double-click the File Transfers activity to open the Modify Permissions Definition dialog box, as shown above. Mark the Allow Cloud Delivery and Allow Automatic Cloud Delivery checkboxes, then OK. Click OK again to close the Modify Permission Definitions for Set dialog box.
To grant external users access to the project on Info Exchange
1. From Project Center project, open the Project Team activity center and select the external user you want to grant access to.
2. Click Modify in the Tasks panel to open the Modify Project Team Member dialog box and click the Project Roles and Permissions tab.
3. Mark
the Allow Web Access to This Project
on Your Info Exchange Server checkbox, as shown here, then click
OK.
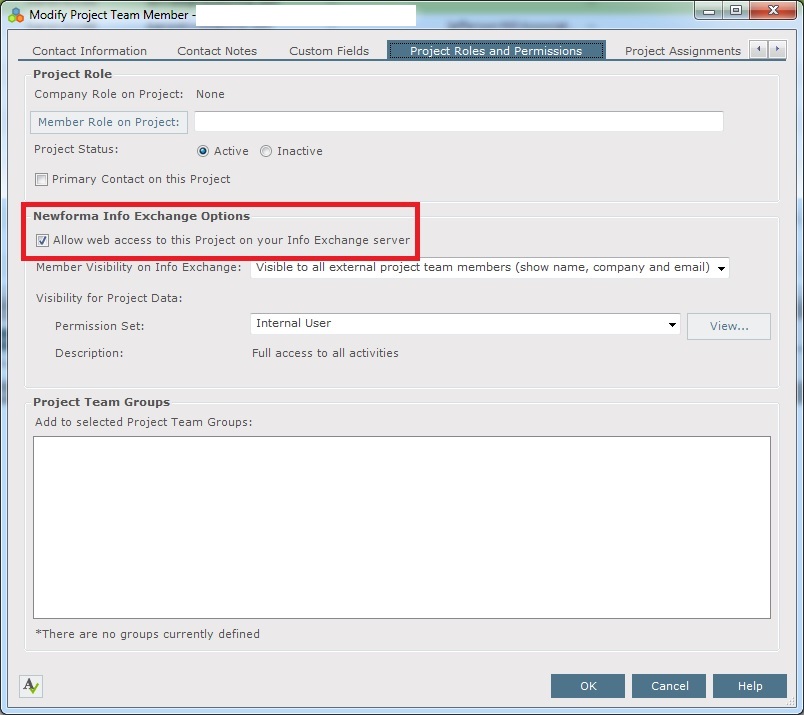
To assign external users to a permission set that allows cloud delivery
1. In a Project Center project, open the Project Team activity center and select the external user you want to assign to a permission set.
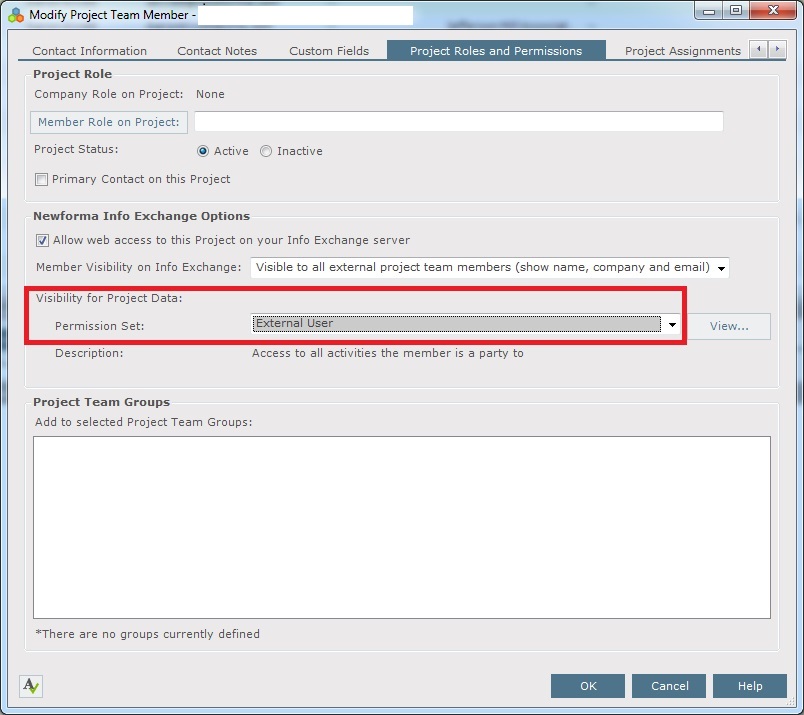
2. Click Modify in the Tasks panel to open the Modify Project Team Member dialog box and click the Project Roles and Permissions tab.
3. Click
the Permission Set drop-down list,
as shown here, and select a permission set that allows cloud delivery.
4. To check
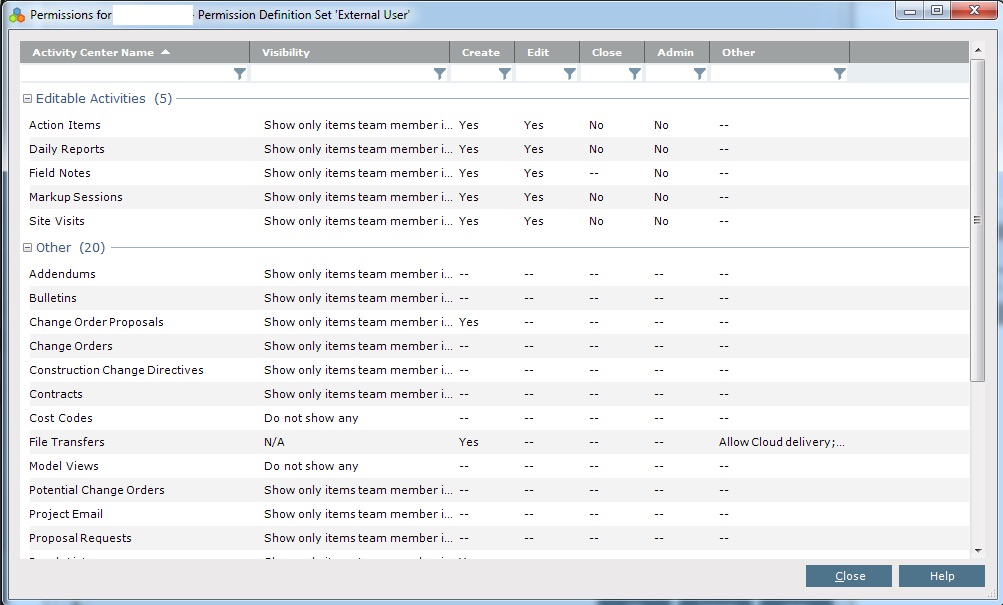
if the permission set has access to cloud delivery set, click the View button to open the Permissions
for dialog box, as shown here, and verify that File
Transfers has Allow Cloud Delivery under the Other
column.
5. Click OK.
Table of Contents
Index
Search (English only)
Back


