Import Building Elements from a Spreadsheet
This topic offers guidelines on creating a spreadsheet template in Microsoft Excel for importing building elements into Project Center.
You can access the sample building elements spreadsheet template supplied with Project Center in the following location: C:\Program Files\Newforma\Tenth Edition\Project Center\Templates\Import_BuildingElements_Template.xlsx.
1 You must be a Project Center administrator to perform this procedure.
Building element fields
The import spreadsheet has the following fields:
● Category – The element’s Revit category.
● Number – The value of the element’s Revit Mark parameter.
● Name – The value of the element’s Revit Name parameter.
● Author – The team member that serves as the owner of the element.
● Team Members – The team members designated as points of contact for the element.
● Keywords – The keywords that apply to the building element. Separate multiple values with a semicolon. Whether all entries must already be in the project keywords keyword list depends on the project settings.
● ID – A tracking ID generated by Project Center. Leave this field blank when adding data to the template.
1 The building elements import includes the <BuildingElementsExtendedPropertiesDataTable>.
To create an import file for building elements and import it
|
1. |
Make a backup copy of your existing spreadsheet with the data. |
|
2. |
Edit the spreadsheet and fill in the required data: ● Add the desired building element extended properties (Group Name, Property Name, Default Value, Show in Log, and Read Only). ● Insert any newly created extended property’s group and property names into the Building Elements Data Table: ● Add them before the ID column. ● Follow the syntax of <Group Name.Property Name>. ● The column order must follow the row order of the Extended Properties table. ● Remove any extra rows from either table. Don’t remove any header or footer rows (marked with braces). |
|
3. |
Copy your data columns to the Import_BuildingElements_Template.xlsx file, replacing the sample columns with your own information. |
|
4. |
Edit the field values based on the information given in the Building element fields section above. Add values to fields where required. |
|
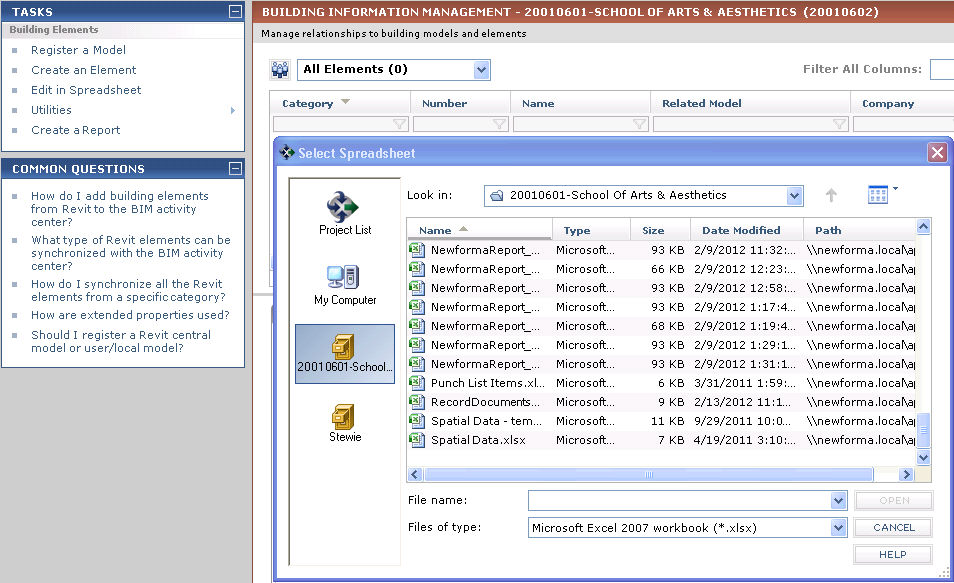
5. |
After you finish editing the Import_BuildingElements_Template.xls spreadsheet, import it into a Project Center project by opening the Building Models and Elements activity center and clicking Utilities >Import Spreadsheet from the Tasks panel to open the Select Spreadsheet dialog box, as shown here. Locate the spreadsheet, then click Open.
|
|
6. |
After it is imported, the Import Log dialog box opens showing any import errors. Fix any errors that appear in the spreadsheet, then re-import it. 1 The import will not succeed until all errors are addressed. |