Relate Project Center Items to Each Other
Perform the following steps to manually link any item created in Project Center to another Project Center item to relate them to each other.
To link Project center items to each other to create a relationship
|
1. |
Open the Project Center activity center containing the item you want to link. This example uses the Project Document Sets activity center. |
|
2. |
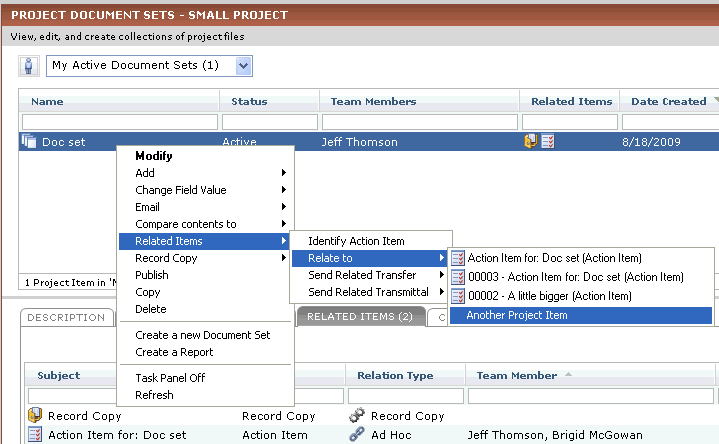
You can locate items to link in either of the following two ways: ● Select the item from the log, click its Related Items tab, and click Relate to > Another Project Item, as shown here: Or ● Right-click on the item you want to create a relationship to from the activity center log, then select Related Items > Relate to > Another Project Item, as shown here:
|
|
3. |
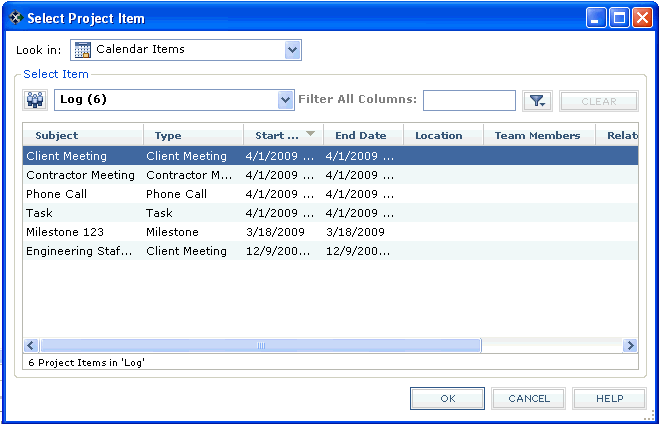
In the Select Project Item dialog box, select the type of item you want to link to from the Look in field.
|
|
4. |
Select the item to link to from the list of items, then click OK to create the relationship. The items will be listed in each other's Related Items tabs. |
There are various other ways to automatically link Project Center project items together to establish related item relationships:
-
Adding files or folders to a document set.
-
Adding files to the Supporting Documents or Associated Items tabs of project items.
-
Publishing a folder or document set to Info Exchange.
-
Creating a record copy of a shared folder, file transfer, or other project item.
-
Creating a markup session from a source file.
-
Adding items to a timeline event.
-
Extracting a record copy to a folder.


