Schedule an Expected Submittal from Microsoft Outlook
Perform the following steps to file a submittal you are expecting to track its status, when it's due, and its history of actions.
To schedule an expected submittal from Microsoft Outlook
|
1. |
In Microsoft Outlook, select the email message you want to file as an expected submittal. |
|
2. |
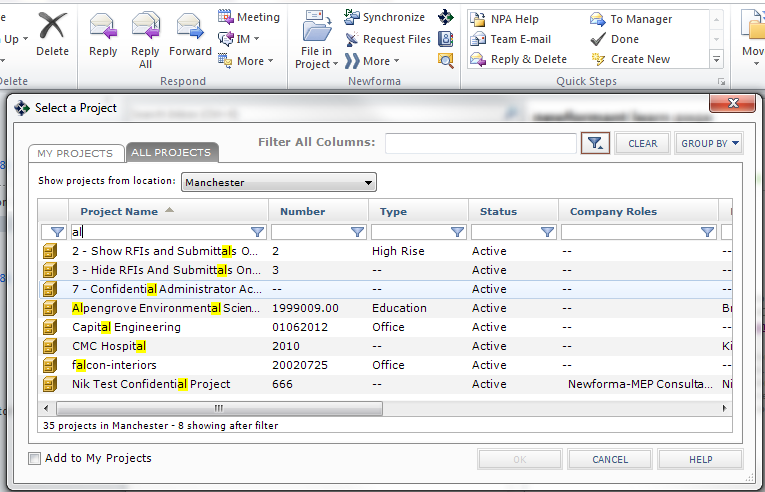
From the Project Center Add-in for Microsoft Outlook Ribbon Bar, click File in Project > File As to open the Select a Project dialog box, as shown here:
|
|
3. |
Select the project in which to file the expected submittal, then click OK to open the File as dialog box:
|
|
4. |
Select the New Item option, then select Submittal and click OK to open the Log a Submittal dialog box, as shown here:
|
|
5. |
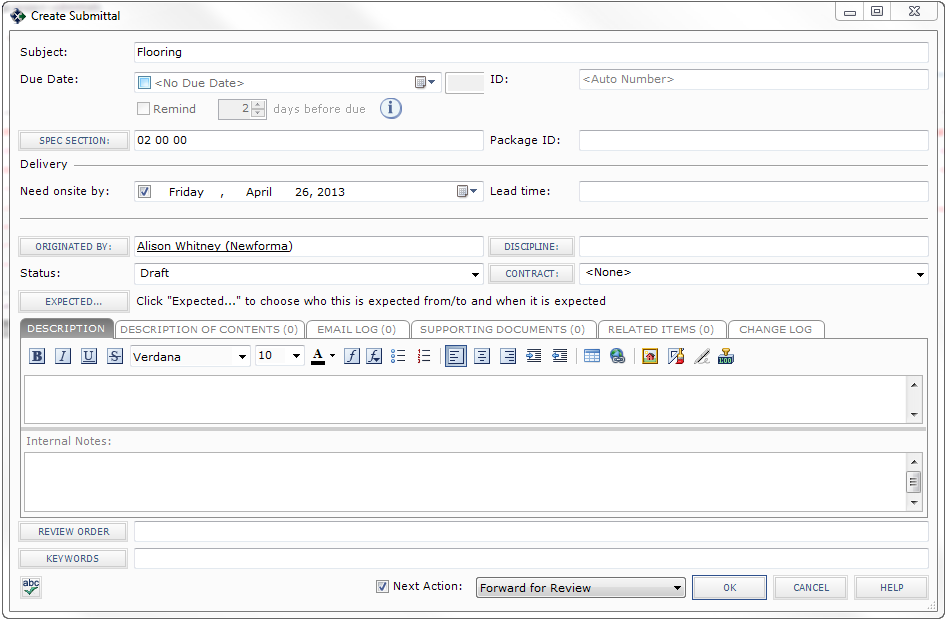
Choose the Schedule an Expected Submittal option (or the Select from a List of Expected Submittals option), then click OK to open the Create Submittal dialog box, as shown here:
|
|
|
Project Center automatically enters the following information:
|
|
6. |
Click Expected to open the Expected Submittal dialog box. Mark the checkbox and enter the date you expect to receive the submittal in the Expected Date field. |
|
7. |
Describe the contents of the submittal in the Description of Contents tab. Add one line for each item. This information is used to fill in the Contents section of the Transmittal form. |
|
8. |
To include any additional files with the submittal, add them by clicking the Supporting Documents tab, then clicking Add Files > Another Project File. Navigate through the folders until you locate the file, then click Open. Repeat as necessary until you have added all the necessary files. |
|
9. |
Modify any other information as necessary. |
|
10. |
Click OK at the bottom of the dialog box. Project Center files the submittal in the Expected log of the Submittals activity center. |


