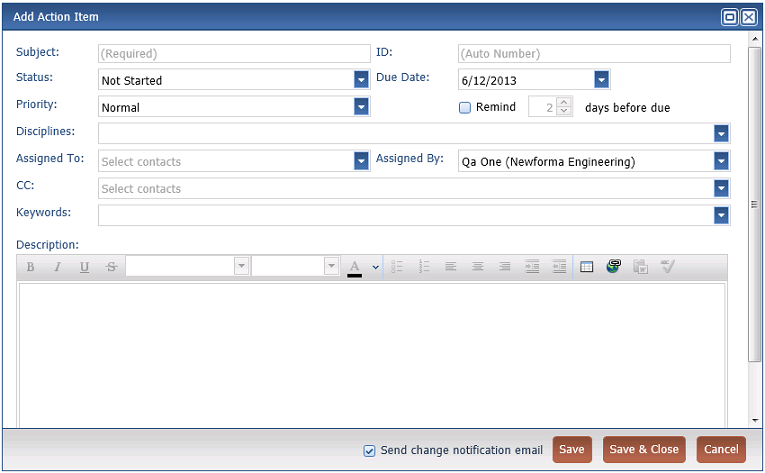
Add an Action Item
Perform the following steps to create a new action item.
To create a new action item, you must be a member of a Permission Set that allows for the creation of new action items.
To add a new action item
1. Click Add Action
Item from the Action
Item log in Info
Exchange to open the Add
Action Item dialog box, as shown here:

2. Enter the subject in the Subject field.
3. The ID value is automatically generated for the action item. You may manually enter an ID number if this is preferred.
4. Select the status from the drop-down list.
5. Select the due date from the drop-down list.
6. Click the Remind checkbox and select the number for Days before due.
7. Select the priority from the drop-down list.
8. Select the disciplines to apply to the action item from the drop-down list.
9. Click in the Assigned To field to open the Select Project Team Members as Recipients dialog box and select the contact or contacts to assign the action item to.
10. Select keywords for the action item as needed from the drop-down list.
11. Enter any relevant information in the Description field.
12. Click Save and Close to create the action item.
To save your work and continue editing the action item, click Save.
You cannot add supporting documents to a new action item via Info Exchange. Additionally, filing email to an action item must be completed from Project Center or the Outlook plug-in.

