Respond to a File Transfer Request
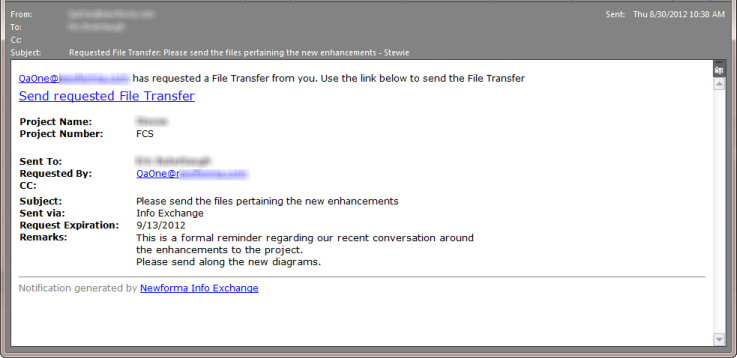
Project Center users can request file transfers from other members of the project team. As the recipient of a transfer request, you are notified of the request via an email notification.
Perform the following steps to respond to a file transfer request send from another project team member.
To respond to a file transfer request
1. Open the file transfer request email notification,
shown here:

When responding the to the file transfer request, you have limited access on Info Exchange. Contact the project administrator for greater access to the project on Info Exchange.
2. Click the Send
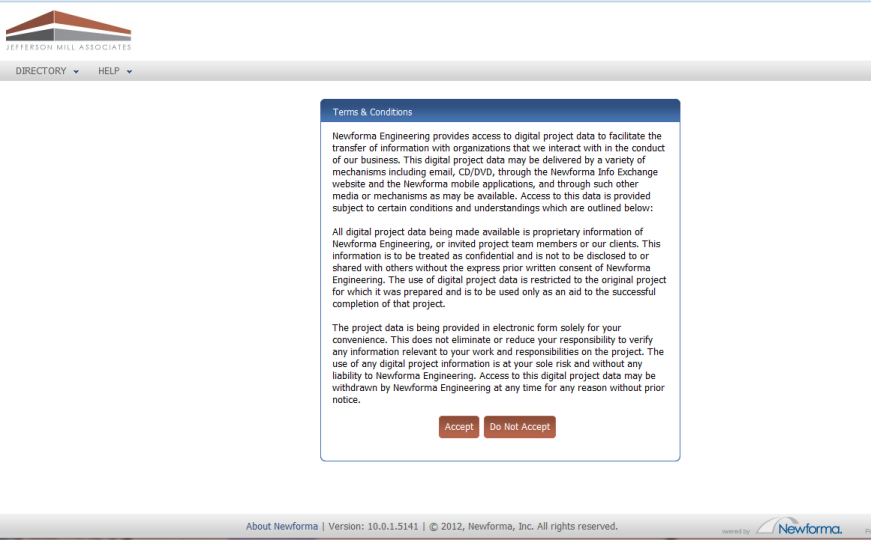
Requested File Transfer link. A browser windows opens to the Terms and Conditions page for the
company's Info Exchange website, seen below.

3. Click Accept
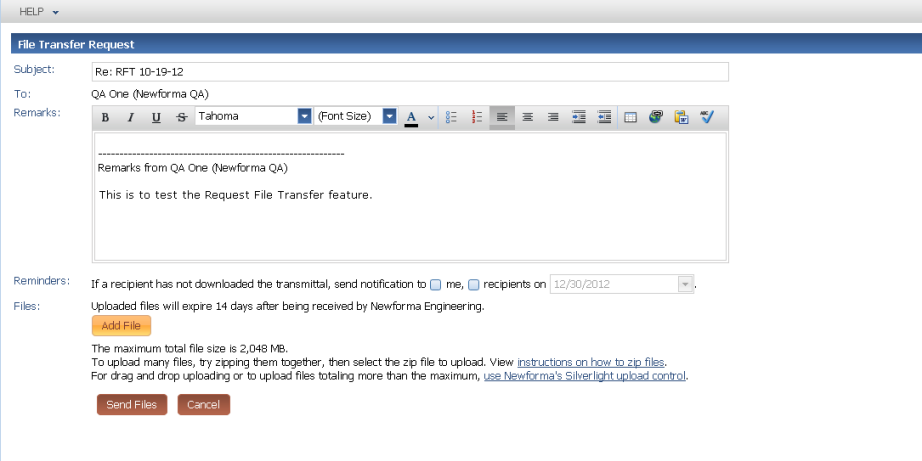
to see the File Transfer Request page on the Info
Exchange website, shown here. Complete the information in the dialog
box and attach any files.
You can add reminders on the transfer. If the transfer is not downloaded,
you can request a reminder be sent to you or the recipient.

4. The Subject is filled in by default, but you can change it if desired.
5. Enter any remarks in the Remarks field as needed..
6. Set a download reminder date by selecting the me and/or recipients checkboxes in the Reminders field. Select a date for the reminder from the drop-down list.
7. Click Add File to select the file(s) to upload.
8. Click Send Files to transfer the files. A progress dialog appears to show the progress of the transfer. When the transfer is completed, a confirmation message appears.
9. Close the browser window.
Once you complete the process, the Project Center Server generates an email notification containing links and sends it to the team member who requested the file transfer.
Project Center Users
To receive the files from the transfer, see Receive Transferred Files.

