Log a Field Note
Perform the following steps to log a new field note in Project Center.
To log a new field note in Project Center
|
1. |
If you are not already there, open the Field Notes activity center by clicking Field Notes from the Activities list or the Project Home activity center. |
|
2. |
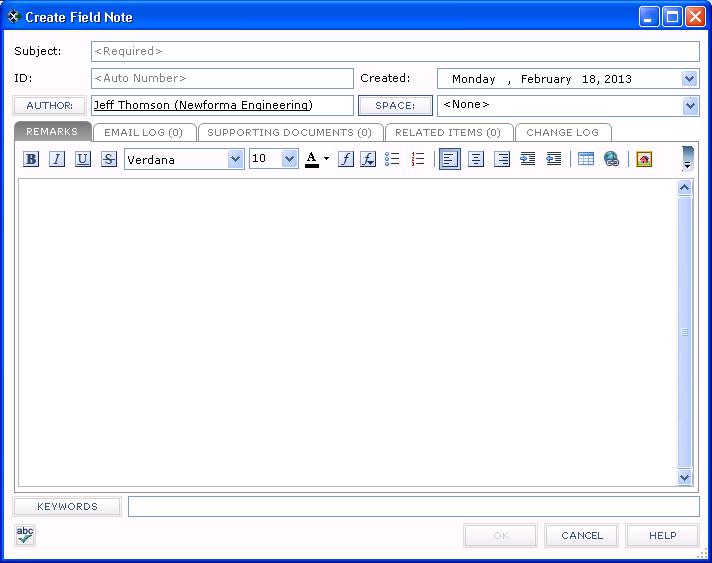
From the Tasks panel, click Create Field Note to open the Create Field Note dialog box, as shown here:
|
|
3. |
Enter the subject of the field note in the Subject field. |
|
4. |
Select the field note's creator by clicking Author. |
|
5. |
If the field note is related to a space, click Space to open the Choose Space dialog box and select the space. |
|
6. |
Enter the purpose of the field note and any other comments in the Remarks tab. |
|
7. |
If you want to attach media or other files to the field note, click the Supporting Documents tab, then click Add Files > Another Project File to open the Add Supporting Documents dialog box to locate the files. Click Open to add the files. |
|
8. |
The Email Log tab lists all email messages associated with the field note. When a user clicks File as or File in Project (then chooses the Field Notes option) from the Project Center Add-in for Microsoft Outlook Toolbar, the email message appears here. You can also add email messages by clicking Add or dragging and dropping from Microsoft Outlook. |
|
9. |
Click the Related Items tab to relate (link) this field note to another Project Center item. |
|
10. |
Click OK when finished to create the field note and log it in the Field Notes activity center. |


